

Introduction
In our previous blog we explained how VPN applications work internally and what implementation mistakes can be made that could result in elevation of privileges. In particular we looked at applications using OpenVPN as a component in their solution as our initial recon indicated that this is where most issues occur.
In this blog we will describe our approach to finding these issues in Windows applications. We will show that using (relative) simple steps issues can be found relatively quick. Any tech savvy reader should be able to follow these steps and should be able to reproduce our work and/or find similar vulnerabilities.
In our next blog post we'll describe a similar methodology for macOS applications. We've made this distinction mainly due to different tools and techniques that are available for both platforms.
Step 1: run it
After installing the VPN application, the first thing you'd probably want to do is to run it and get a general idea of what goes on under the hood. Sysinternals' Process Monitor is the perfect tool to do your initial assessment of the application. We'd recommend downloading the Sysinternals Suite, which includes Process Monitor.
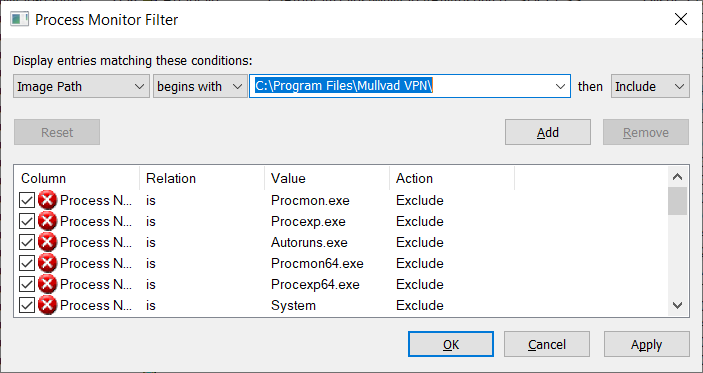
The key to using Process Monitor is to configure one or more filters, otherwise you will be overwhelmed with information. A good filter to start with is to include everything for which the Image Path begins with the VPN application's installation folder.
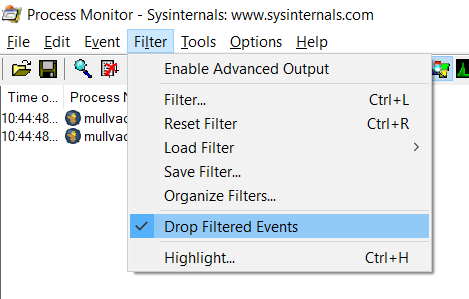
By default, Process Monitor will only show the results that matches the filters, but it will keep a copy of all other events. This allows you to adjust the filter without having to restart the target application. The downside is that if you use Process Monitor for a prolonged time it will start consuming lots of system resources. If you're happy with the current filter, you could choose to drop all filtered events not shown by Process Monitor. Go to the Filter menu and check Drop Filtered Events.
With Process Monitor ready it is time to start using the VPN application. Make sure to use as much of its features as possible. Some applications will default to a different VPN implementation (eg, Wireguard). If you want to research the OpenVPN implementation - like we did - configure the VPN application to use OpenVPN. When connecting to a VPN server, you should see in Process Monitor that OpenVPN is launched by the VPN service.
After using the VPN application for a while, you should have quite a lot of events. It is possible to manually go through all of them, but you probably want to add additional filters to narrow down the results. For example you're probably not interested in files loaded from the application's installation folder or from the Windows system folder. Besides the filter, the Tools menu of Process Monitor also contains a number of useful summaries that can be used.
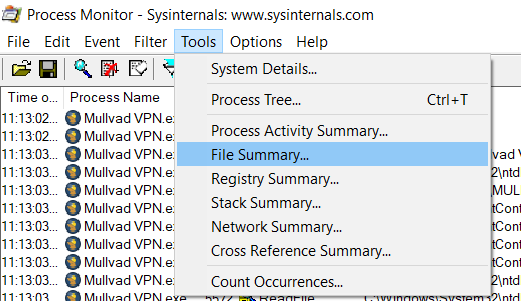
When looking for file hijacking vulnerabilities, the File Summary provides a quick way to get an overview of all files that have been accessed or for which an attempt was made to access them. We're particularly interested in files access for locations on which we have some form of control (eg, write access). Sort on the Path column to group files by their folder.
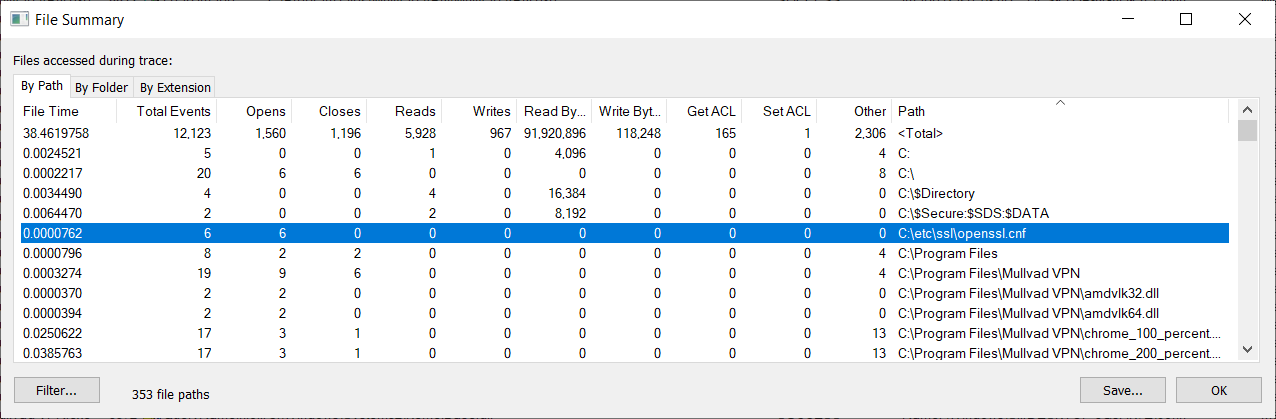
In the File Summary it is possible to double click on the file path to immediately apply it as filter, for example to find out which process is trying to access that file - and with what privileges.

Things to look for when running Process Monitor include:
- Location of the VPN application's log files (if any). Log files are a great way to learn more about an application's internals.
- Location where the settings are stored and their file permissions. You could run Sysinternals' AccessEnum to get a quick overview of the file permissions.
- Location of any temporary files, many VPN applications will write an OpenVPN configuration file to disk that is provided to OpenVPN as a command line argument. Again check the file permissions, you may be able to replace the OpenVPN configuration before OpenVPN is launched. Also when testing the service API you can inspect these files to see which user input is written to them, and whether or not it is possible to inject arbitrary data in them.
Step 2: figuring out the IPC channel
After running Process Monitor and maybe uncovering some vulnerabilities along the way, it is time to dig deeper. As we've explained in part 1, most OpenVPN-based VPN applications will have a service running to which a front-end connects in order to create VPN connects.
We could use the front-end application to interact with this service, but this severely limits what user input we can send to it. Ultimately, we'd like to create our own (quick and dirty) client that can interface with the service. The VPN applications we've tested either create one or more named pipes or use network socket(s) for their IPC communication.
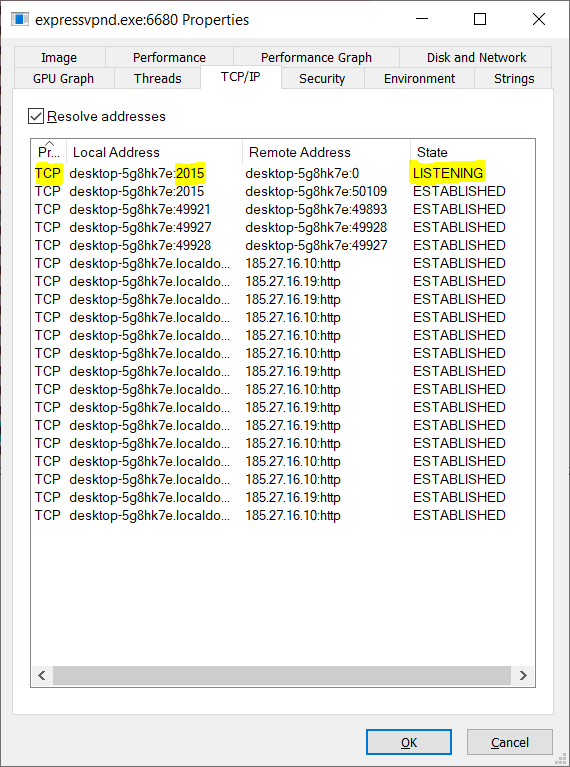
To figure out which channel is used, it is possible to use Process Explorer - another Sysinternals tool. Launch Process Explorer and locate the service in the process tree, double click the process to view its properties. Go to the TCP/IP tab to see if there are any network ports exposed by the service.
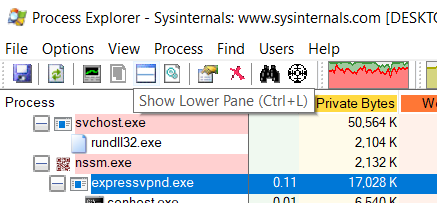
If there are no listening ports shown in the TCP/IP tab, then the service is most likely using named pipes. To find out how the named pipe(s) is named open the Lower Pane (if not already opened) in Process Explorer by pressing CTRL+L or clicking the Show Lower Pane icon in the toolbar.
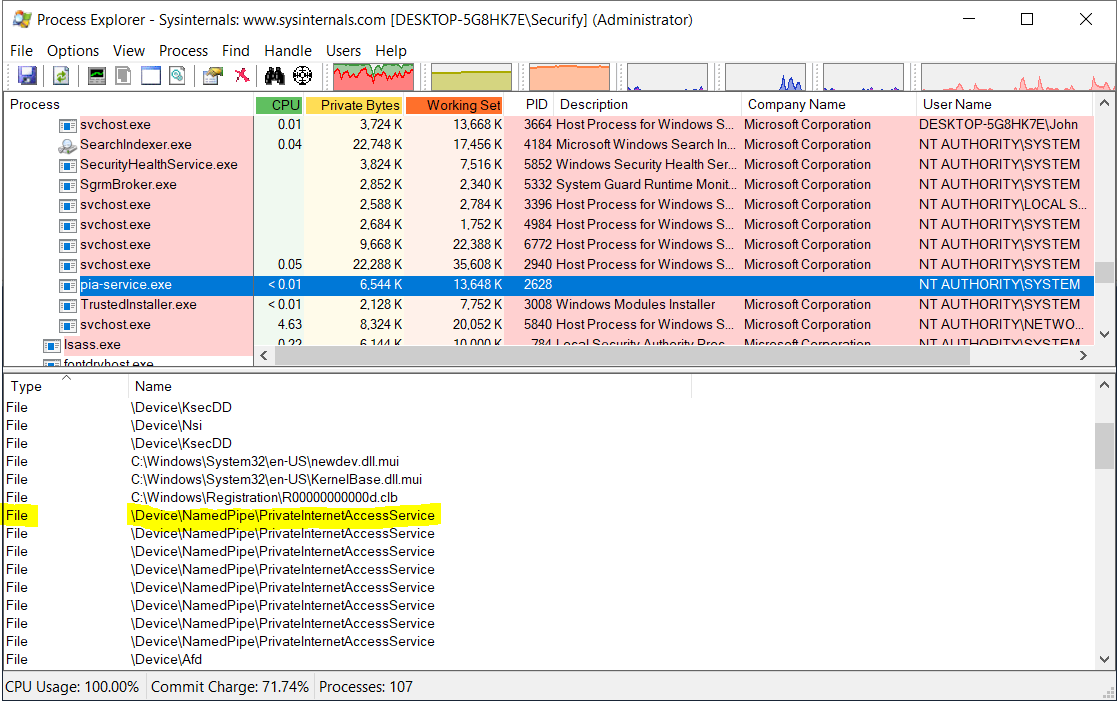
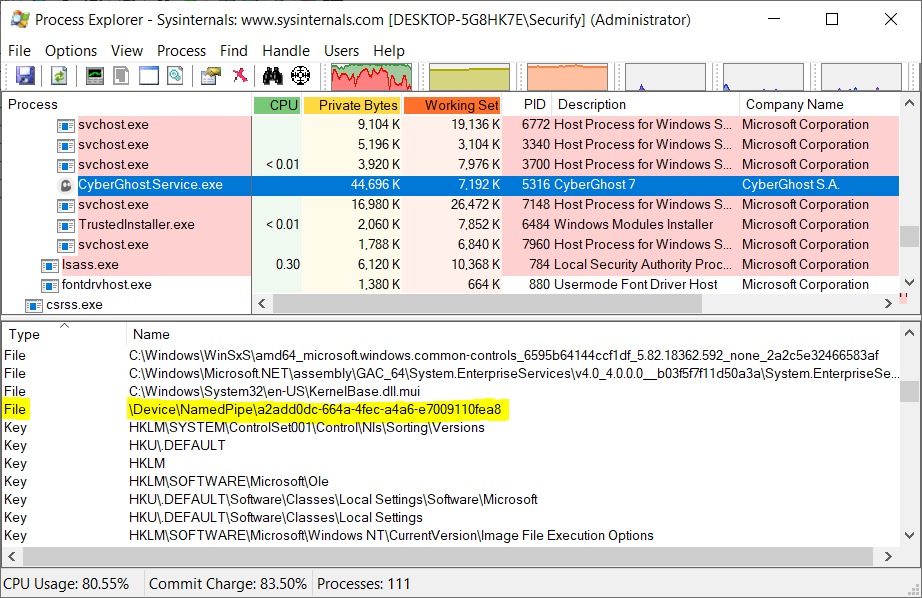
Select the VPN service in the process tree and look for files that start with \Device\NamedPipe\. Custom IPC protocols tend to have a readable name for their named pipes. Of all VPN applications that we've tested, most are using WCF as means for IPC. You can quickly identify these as the name of the named pipe(s) have a GUID as their name.
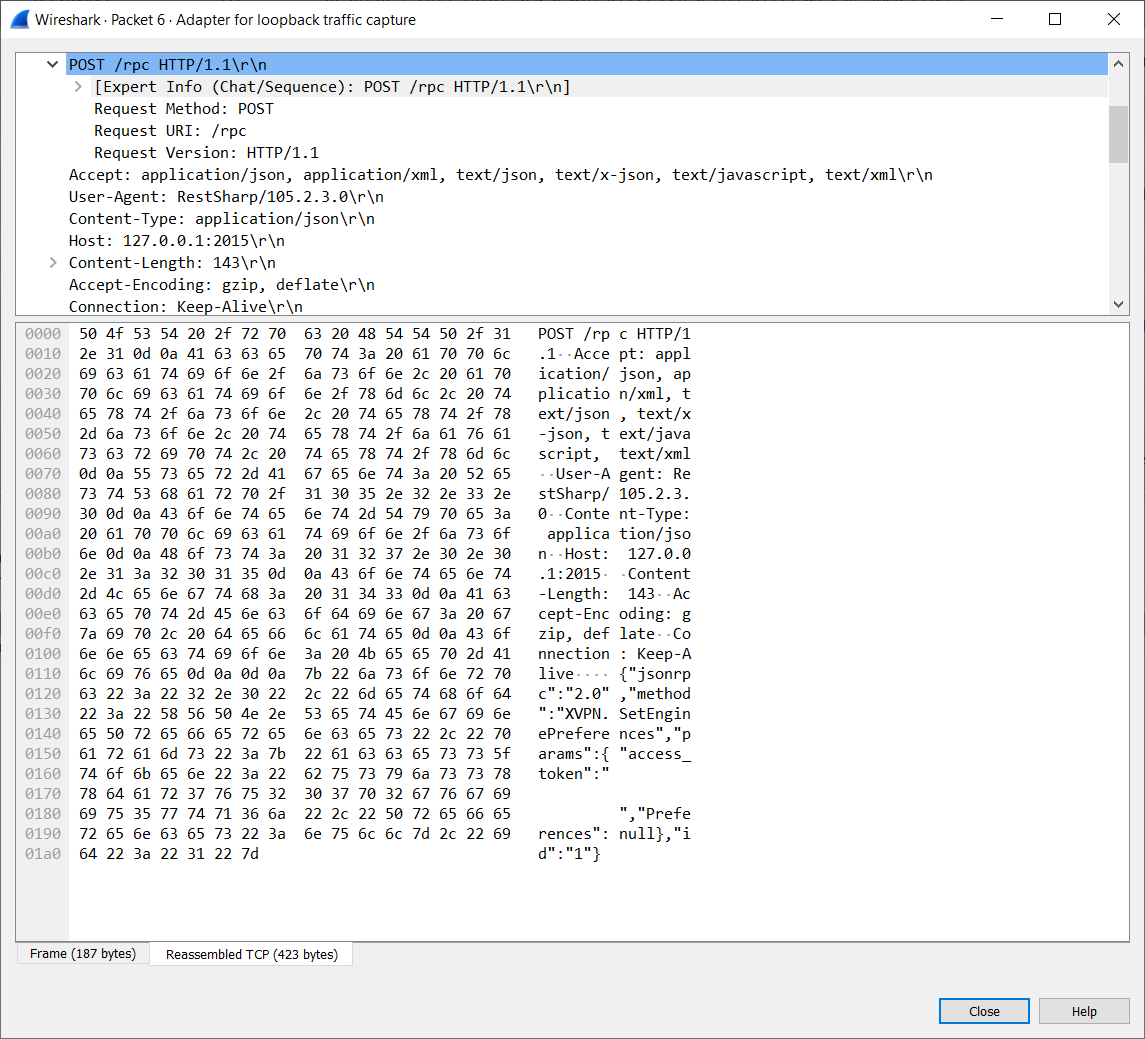
Sniffing sockets
In general, when local network sockets are used by the VPN service, the traffic is not encrypted. Which means we can sniff the network and used the captured data to implement our own client. Wireshark can be used to sniff the traffic send over the loopback device.
Sniffing named pipes
Capturing named pipe traffic is less straight forward. Various tools are available including, Mario & Luigi, and NamedPipeCapture. However we had the most success with IO Ninja, which is a commercial product (trial available).
Even IO Ninja may not produce the output needed to create a custom client - this also depends on the security settings of the named pipe. Fortunately, in most case it is not needed to capture the traffic. On Windows the majority of the VPN applications we've tested are written in .NET, allowing for decompilation. In addition, in many case we can use the application's own DLLs to communicate with the service. This does require some reverse engineering of course.
Step 3: reverse engineering
Use the source, Luke
More and more VPN provides are open sourcing their VPN clients. This way no reverse engineering is required, provided of course you're comfortable with reading source code. You could even build your own client from the source that can then be used to communicate with the service. Some examples - not limited to the applications we researched - are:
.NET applications
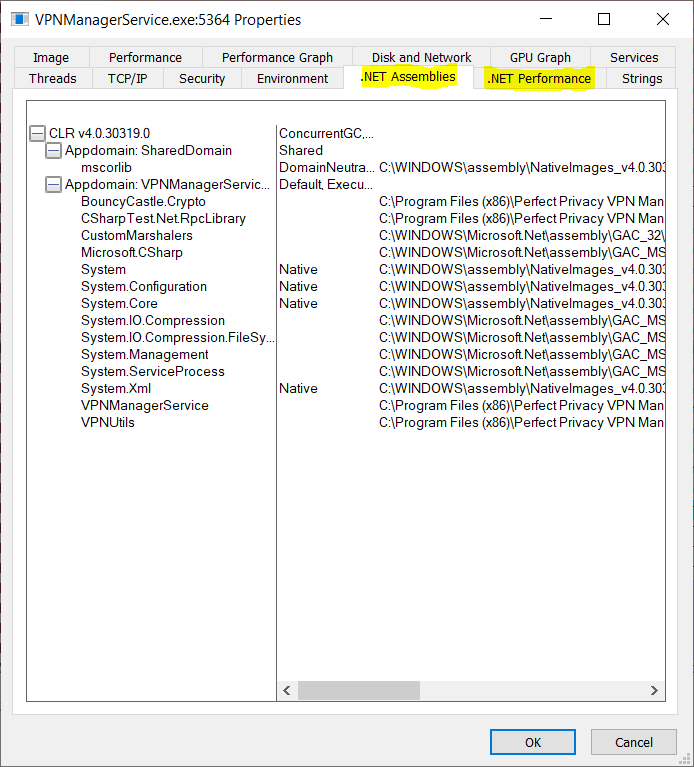
On Windows, 8 out of the 10 VPN applications we've looked at are implemented in .NET. The remaining 2 have open sourced their code. So if you're testing a VPN application for Windows, chances are high it will be written in .NET - or at least parts of it. A quick way to find out if something is written in .NET is by looking in Process Explorer. .NET applications will have .NET tabs in the process' Properties dialog window.
.NET applications can be decompiled, making it easier to inspect their internals. Many tools exist that can decompile .NET applications, including JustDecompile, ILSpy, dnSpy, and dotPeek.
Some applications use obfuscation to make reverse engineering more difficult. In our case, we're mostly concerned in the application's API. In general, the API interfaces aren't obfuscated, and based on the method names and parameter names it can be deduced what the API is supposed to do.
Step 4: creating the client
Another benefit of .NET is that it is easy to interface with .NET code from PowerShell. As proper coding standards dictate, all API-relevant code can often found in one or more (separate) .NET Assemblies (DLLs). Consider the following code fragment that was found while reverse engineering a .NET application.
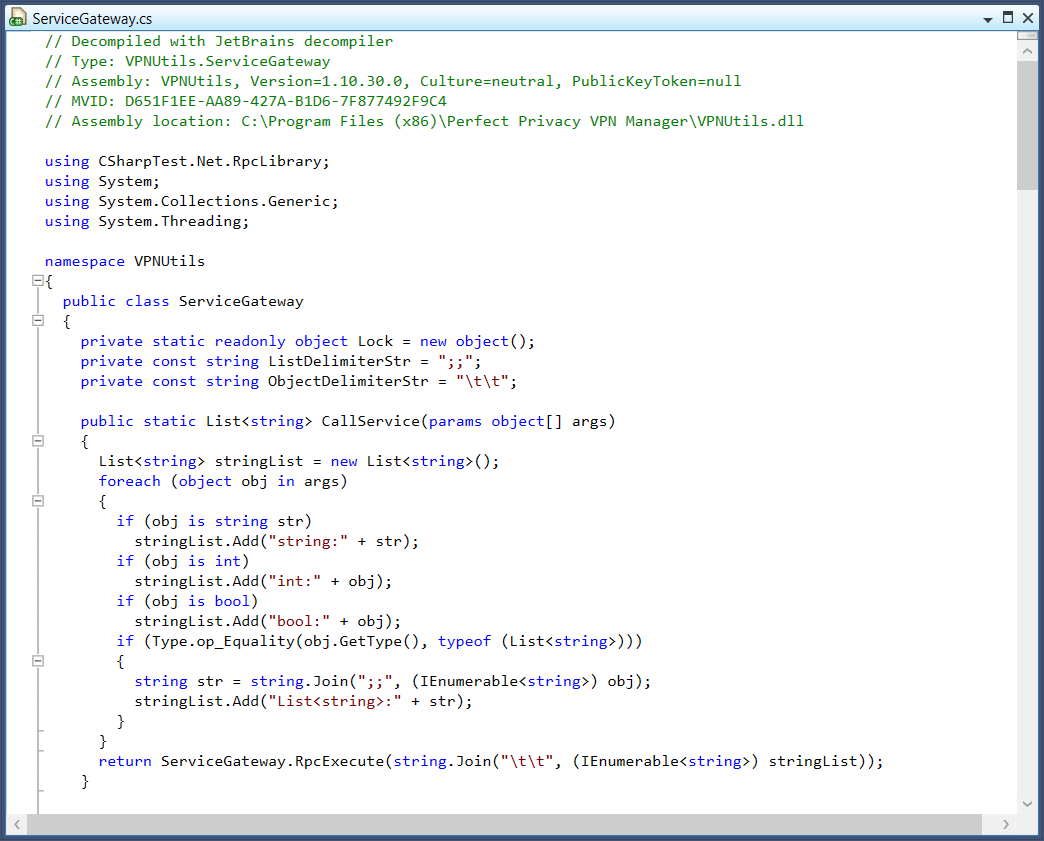
We found that there is a class named ServiceGateway that has a static method named CallService(), which seems to call the VPN service. The method only has one argument that takes an array of Objects. The class is located in the DLL C:\Program Files (x86)\Perfect Privacy VPN Manager\VPNUtils.dll. To use the class in PowerShell, the first thing that needs to be done is load the Assembly:
Add-Type -Path "$(${env:ProgramFiles(x86)})\Perfect Privacy VPN Manager\VPNUtils.dll"
If the Assembly is loaded successfully, we should now be able to invoke the CallService() method from PowerShell:
$args = @()
[VPNUtils.ServiceGateway]::CallService($args)
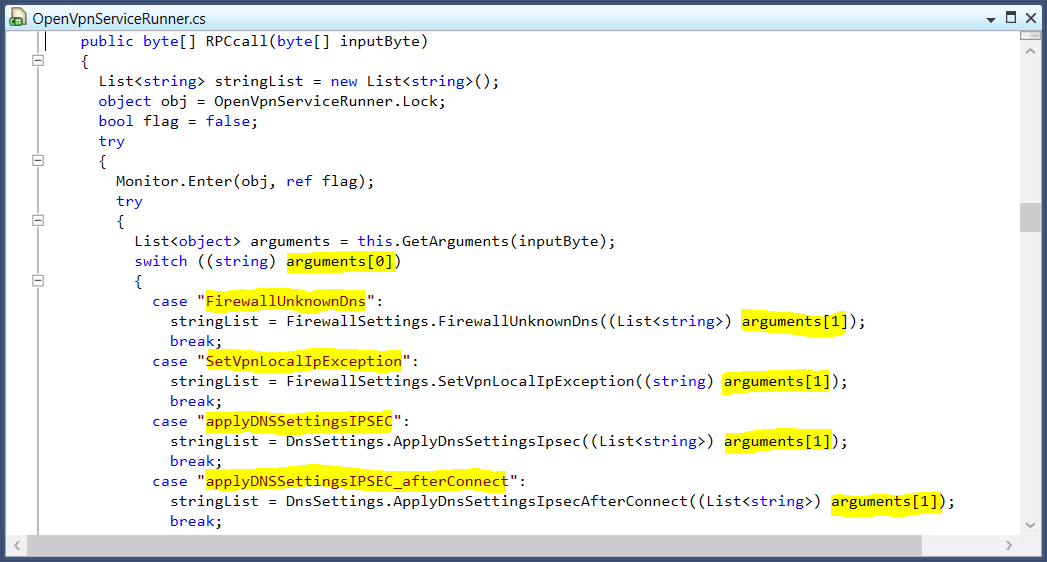
The final step in this case it to figure out what values need to be passed to CallService(). After some more digging we can find the OpenVpnServiceRunner class in the VPN service that implements the code that handles the API calls. We can see that the first entry in the Object array is a string value that contains the API name that needs to be called. The remaining array entries are then passed to a method that handles the API call, the number of arguments needed is different per API call.
With this information we have enough to make API calls. Naturally, we'd want to do this while running at least Process Monitor to see what is going on when making the call.
Add-Type -Path "$(${env:ProgramFiles(x86)})\Perfect Privacy VPN Manager\VPNUtils.dll"

$args = @(
	"SetVpnLocalIpException"
	"10.20.30.40"
)
[VPNUtils.ServiceGateway]::CallService($args)
WCF
Of the 8 VPN applications that are written in .NET, 5 are using WCF for their IPC (over named pipes). It is also possible to use WCF from Powershell. To do so, we need to find out at least three things:
- the name of the WCF endpoints;
- type of communication (One-Way or Duplex);
- the associated WCF models.
Assuming that the service uses WCF over named pipes, finding the endpoint names is often as easy as searching for the string value net.pipe://.

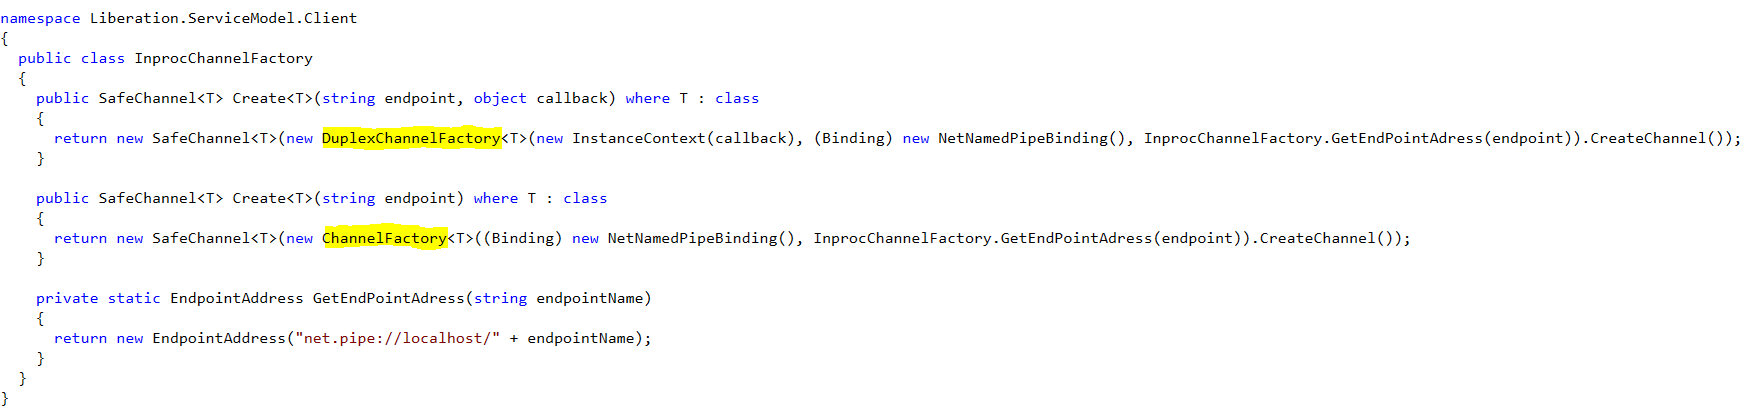
To determine whether an endpoint is One-Way or Duplex, research what type of channel is created by the VPN application. If the ChannelFactory class is used, the communication is One-Way. Duplex channels are created with the DuplexChannelFactory. The biggest difference here is that for Duplex channels, you'll also need to implement a callback class - which can be an empty class.
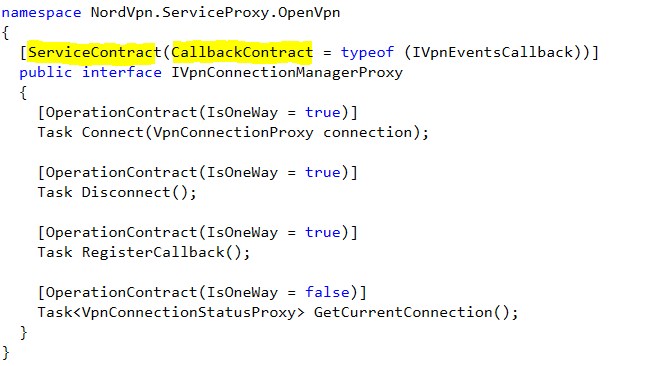
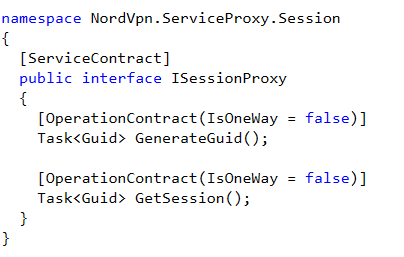
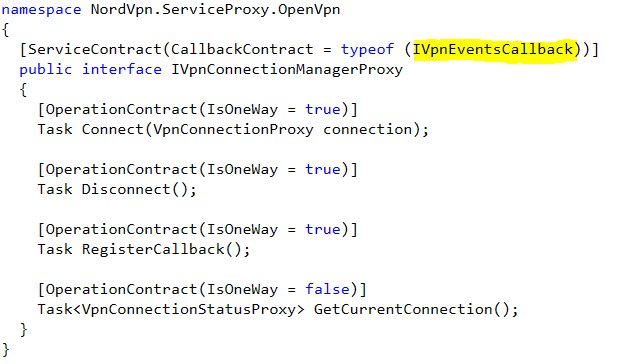
A quick way to find the WCF models, it by searching for class interfaces that are annotated with ServiceContract. This is also a good way to find out if the communication is One-Way or Duplex as the annotation for Duplex classes also include the callback class interface that needs to be implemented.
If we'd like to call these WCF methods using PowerShell, we need to tell PowerShell to load the .NET Assemblies that implement the WCF models and interfaces. In addition, we also need to load the System.ServiceModel .NET Assembly that contains the functionality needed to do WCF calls:
Add-Type -AssemblyName System.ServiceModel
Add-Type -Path "$(${env:ProgramFiles(x86)})\NordVPN\NordVpn.Core.dll"
Add-Type -Path "$(${env:ProgramFiles(x86)})\NordVPN\NordVpn.ServiceProxy.dll"
To call a One-Way service, we need to instantiate a ChannelFactory with the correct WCF model, binding (eg, named pipe), and endpoint name. If all checks out, we can than call CreateChannel() and use the returned object to call the methods that are defined in the WCF model.
$binding = New-Object System.ServiceModel.NetNamedPipeBinding
$endpoint = "net.pipe://localhost/nordvpn-service/SessionManager"
$factory = New-Object System.ServiceModel.ChannelFactory[NordVpn.ServiceProxy.Session.ISessionProxy]($binding, $endpoint)
$client = $factory.CreateChannel()
$client.GenerateGuid().Result
$factory.Close()
Calling a Duplex service is a bit more work as we also need to implement a callback class. Unless we're interested in the returned data we can leave the implemented methods empty.
Class VpnEventsCallback:NordVpn.ServiceProxy.OpenVpn.IVpnEventsCallback {
    OnStateChanged([NordVpn.Core.Models.VpnProxy.VpnStateChangedArgsProxy]$e) { }
    OnErrorOccured([NordVpn.Core.Models.VpnProxy.VpnErrorOccuredArgsProxy]$e) { }
}

$callback = New-Object System.ServiceModel.InstanceContext([VpnEventsCallback]::new())
$binding = New-Object System.ServiceModel.NetNamedPipeBinding
$endpoint = "net.pipe://localhost/nordvpn-service/ConnectionManager"
$factory = New-Object System.ServiceModel.DuplexChannelFactory[NordVpn.ServiceProxy.OpenVpn.IVpnConnectionManagerProxy]($callback, $binding, $endpoint)
$client = $factory.CreateChannel()
$client.RegisterCallback()
$client.Disconnect()
$factory.Close()
Step 5: finding & exploiting vulnerabilities
With the results from Process Monitor and your custom client, it is now possible to try and find vulnerabilities. We'll leave this as a reader's exercise 😉. See our previous blog for some inspiration for the type of issues you can look for.